Changing The Name On A NEC DSX 22B Display Tel

Posted on

NEC DSX Version 3 Instructions

To program your extension’s name:

  1.   Push Menu + Name (Menu + 81).
  2.   Enter the name using the keypad.
  3.   Push Save when you are done or Cancel to exit without saving.

To program a name for your co-worker’s extension (From Operator/Admin Extension):

  1.   Push Menu + Admin + Extension Name (Menu + 03).
  2.   Enter your co-worker’s extension number and push Next.
  3.   Enter the name using the keypad.
  4.   Push Save when you are done or Cancel to exit without saving.

NEC DSX Software Version 2

To change the name that is displayed on your NEC DSX 22B display tel telephone:

  1. Press the soft key under Menu
  2. Press the soft key under More until you see Name on your display
  3. Press the soft key under Name
  4. Press the Clear button to erase the current name and use the keypad to enter the new name
  5. Press the Speaker button to exit

If you are using the auto-attendant dial by name directory the name you program here will determine your listing in the directory. If you do not have Name as one of your soft key options then your station does not have the class of service to change names and it must be programmed from extension 300.

NEC DSX Telephone System 3.43 Software Release

Posted on

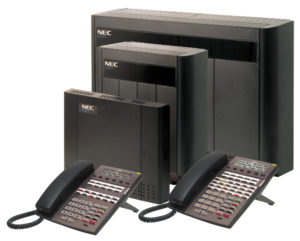
DSX System Software version 3.43 is an important new release that introduces many new IntraMail features, implements VoIP QoS capability, offers Dial while in a Conference, and provides other new features and software corrections. The companion System Administrator version 3.33 is required for this new release and is also available. The new System Administrator also includes new Voice Prompts (v2.40) that are necessary for several of the new IntraMail features.

IntraMail

First Time Setup

When logging into their mailbox for the first time, the mailbox subscriber is prompted to set up their Security Code, record a personalized Mailbox Name, and record their Greeting. First Time Setup helps personalize and secure each mailbox. The subscriber can follow the voice prompt instructions and complete these steps or optionally skip the options and go right to their mailbox. If they skip the First Time Setup options, they will not repeat unless the mailbox is initialized.

Initialize Mailbox

Initialize Mailbox allows the installer to return any mailbox to its initial default state. This is typically done when an employee leaves the company and a new employee wants to use the same mailbox. Initializing a mailbox:

  • Erases the Security Code
  • Deletes all Greetings
  • Deletes the Mailbox Name
  • Deletes the Paging Message
  • Erases all messages in the mailbox
  • Turns First Time Setup back on
  • Sets all other options for the mailbox to their default settings.

Greeting Schedules

The three mailbox Greetings can be put in a schedule so that they are active on different days at different times. This allows the subscriber to customize their greetings for different periods during the work week. For example, Greeting 1 can be active every day of the week when not in the office, Greeting 2 can be active during work hours (Mondaythrough Friday from 8AM to 5PM), and Greeting 3 can be active every work day during lunch (Monday through Friday from 12PM to 1PM).

In lieu of scheduling, a greeting can be made Active at All Times. This operates identically to non-scheduled greetings in prior releases. By default, greetings are not scheduled and Greeting 1 is Active At All Times.

When a subscriber logs into their mailbox and presses Greet(Greeting), the voice prompts tell them which Greeting is active and if a Greeting is set for Active at All Times.

Busy Greeting

The Busy Greeting is a unique mailbox Greeting that can play to Automated Attendant callers when the extension is busy. For example, the Busy Greeting could say, “I’m on the phone right now. Leave me a message and I’ll call you right back.” This lets the caller know that the extension user is busy on the phone, not away from their desk or out of the office.

While the extension user is busy on a call, the Busy Greeting will play to Automated Attendant callers who were routed to the busy extension via Screened Transfer. All other callers will be handled normally by the system and hear the active Greeting.

Find Me Follow Me Day of Week Selection

The Find Me Follow Me schedule is enhanced with the day of week selection. In addition to the destination start and stop times, the Find Me Follow Me schedule now allows destinations to be enabled and disabled for each day of the week.

Message Notification Day of Week Selection

The Message Notification schedule is enhanced with the day of week selection. In addition to the destination start and stop times, the Message Notification schedule now allows destinations to be enabled and disabled for each day of the week.

Directory Dialing Automatic Routing

If an outside caller is answered by a Directory Dialing Mailbox, and they dial the first few letters of a person’s name, they will be automatically routed to a list of choices without having to dial #. This is helpful to callers who are unaware that they should dial # to complete their entry. Dialing # is still available, and saves time, but it is no longer required to complete the routing. In prior software versions, if the caller forgot to dial # they would be prompted to repeat their entry and routing would not occur.

Dial Action Table Go Back Option

The Dial Action Table Go Back option returns an Automated Attendant caller to the Routing Mailbox from which they came. For example, an Automated Attendant could be set up with successive Goto options that allow the caller to access Call Routing Mailboxes for national, regional, state and local Sales offices. The Go Back option would allow:

  • A caller in the local Call Routing Mailbox to back up to the state office.
  • A caller in the state Call Routing Mailbox to back up to the regional office.
  • A caller in the regional Call Routing Mailbox to back up to the national office.

Dial Action Table Alternate Transfer Destinations

Each Dial Action Table digit can have two simultaneous assignments: aDialed Transfer Assignment and an Alternate Assignment. The Dialed Transfer Assignment is a Screened or Unscreened Transfer to an extension or Department Group corresponding to the dialed digit. By default, digits 3 and 4 have UTRF Dialed Transfer Assignments. This means that an Automated Attendant caller can dial any extensions within the 3xx and 4xx range.

The Alternate Assignment overlays the Dialed Transfer Assignment. If the caller dials a single digit, after about a second they route to the Alternate Assignment. If they dial digits in succession, they route to the Dialed Transfer Assignment.

Alternate Transfer Destinations allows you to set up robust call handling scenarios with a minimum of Dial Action Tables and Call Routing Mailboxes.

Post Dial Announcement

The Post Dial Announcement is an announcement that plays to an Automated Attendant caller after they have dialed their destination butbefore the call is routed. A typical application for the Post Dial Announcement is to play an additional message prior to routing the caller to a customer support group. The message that plays is the Announcement Mailbox Message for an Announcement Mailbox specified as the Post Dial Announcement Mailbox for the answering Call Routing Mailbox. Each Call Routing Mailbox can have its own Post Dial Announcement Mailbox or it can be shared. When setting up the Dial Action Table for the Call Routing Mailbox, program the Alternate Assignment as you would normally but include A anywhere in the Routing dial string to have the Post Dial Announcement play.

Universal Compatibility for IntraMail Email Notification

DSX System Software Version 3.42.16 enhances IntraMail Email Notification by providing compatibility with HTML email, text-based email, and SMS (Short Message Service) messaging. The operation is automatic and is determined by the email client on the destination device (smart phone, cell phone, or PC) and the address entered in Stations: 

Door Box

Door Box Enhancements

Distinctive Chiming

To make it easier for users to determine which Door Box is ringing, each of the standard Door Box chimes can be set to ring one, two, or three times.

Programmable Door Alert Time

The length of time a Door Box will remain active after a visitor at the door presses the Call button is now programmable (1-9999 seconds). An extension receiving the Door Box chime or ring can lift the handset anytime during the Door Alert Time to connect to the Door Box. In prior software versions, the Door Alert Time was fixed at 30 seconds.

FXS/SIP 3rd-Party Door Box Support

An FXS or SIP 3rd-party Door Box can be set up in system programming to operate like a standard proprietary Door Box. For example, by assigning a device as a Door Box, you can program the chime type, relay options, and Ring Group options. When a visitor at the 3rd-party Door Box presses the Call button, it will chime or ring just like a proprietary device. When an extension user answers, DTMF relay controls (if supported in the 3rd-party Door Box) will also be available. Additionally, the 3rd-party device will also follow the Programmable Door Alert Time and Distinctive Chiming settings. The type of DTMF signaling sent to the SIP Door Box is determined by the Profile used by the device.

Alphanumeric Display

Digits Displayed when Calling 3rd-Party Extension
While a keyset user is on a call with an analog or 3rd-party SIP or analog extension, any digits they dial will be shown on their display. In prior software versions, the digits would not be displayed.

Names for Extensions and Lines

Name Display Simplified

For simplicity and clarity, an extension with a name assigned will display just the extension number at the end of display line 2. In prior releases, the extension was preceded by “x”.

NEC DS 2000 phone system intramail goes immediately to voice mail

Posted on

Problem:  On a DS1000/2000 phone system callers are sent directly to a users mailbox instead of ringing the NEC phone and then going to a mailbox.  Dialing or inter-coming  the phone extension number causes the phone to ring as normal.

Solution: This is typically caused when the NEC DS2000 or NEC DSX user inadvertently puts their mailbox in auto-attendant do not disturb.  To remove auto-attendant do not disturb press the voice mail/message key.

Enter phone system voice mail password if necessary.

Press “0” for the NEC Intramail full menu.

Press “G” or “4” for Intramail Mailbox Greetings.

Press “o” or “6” to turn auto-attendant do not disturb on or off (toggle)

Recording the built in auto-attendant greeting on an NEC DSX

Posted on

The following is instructions on recording an auto-attendant greeting using the built-in auto-attendant (not the Intramail).  Follow this link for instructions on recording an auto-attendant greeting when you are using the Intramail voice mail. Note that when using the built-in auto-attendant there is no messaging capabilities.  In order to take messages you will need to add an Intramail Voice Mail Card.

STEP 1: Verify you are at extension 300 (or the administration extension).

STEP 2: With the handset down press #24

“Enter the mailbox number”

STEP 3: DIAL 801 (on older systems you might have to dial 000)

STEP 4: PRESS THE BUTTON UNDER REC

“start recording when you hear the tone, press the # key when you are done”

Thank you for calling. Our normal operating hours are Monday through Thursday 9:00 am to 4:30 pm and Friday 9:00 am to 3:00pm. If you know your parties extension you may dial it at any time or remain on the line for an operator. Thank you for calling.

STEP 5: PRESS THE BUTTON UNDER DONE OR #

STEP 6:  PRESS THE BUTTON UNDER EXIT AND HANG UP

Changing the time and date NEC DSX 22B display tel

Posted on

To change the time and date on a NEC DSX telephone system using a NEC 22B Display Tel or a NEC 34B Display Tel follow these steps:

  1. Locate extension 300 (You can get the extension number by pressing 6 with the phone in an idle state
  2. With the phone in an idle state press # 8 3
  3. Enter 2 digits for the hour (24 hour format)
  4. Enter 2 digits for the minutes
  5. Enter 2 digits for the seconds
  6. Press the HOLD button
  7. Enter 2 digits for the month
  8. Enter 2 digits for the day
  9. Enter 4 digits for the year
  10. Press the HOLD button and then the SPEAKER button to exit programming

If you make a mistake while entering the time and date you can press the CLEAR button to start over.

Setting A Temporary Greeting On A NEC DSX 22B Display Tel

Posted on

The first step is to record your temporary message in an instruction mailbox.  In this case we are using instruction mailbox 803 (003).  Before you record a new message in mailbox 803 make sure that it is not being used by choosing the “listen option” before re-recording.  This is assuming you have a TelephoneSystemsDirect.com NEC DSX phone system consult with your telecommunication manager before making any changes.  For further assistance call 866-898-2303 option 3.

STEP 1: PRESS ICM, DIAL 700.

“please enter the mailbox number”

STEP 2: DIAL 300

“you have no new messages”

STEP 3: DIAL 72

“welcome to the system administrator menu”

STEP 4: PRESS THE BUTTON UNDER INST (OR NEXT TO INSTRUCTION ON A 34-BUTTON SUPER DISPLAY PHONE)

“please enter the mailbox number for the instruction menu”

STEP 5: DIAL 803 (may be 003 on older systems)

“press r to record an instruction menu”

STEP 6: PRESS THE BUTTON UNDER REC

“start recording when you hear the tone, press the # key when you are done”

Thank you for calling. Our normal operating hours are Monday through Thursday 9:00 am to 4:30 pm and Friday 9:00 am to 3:00pm. To leave a message press 1, and you will be contacted as soon as possible. Thank you for calling.

STEP 7: PRESS THE BUTTON UNDER DONE OR #

STEP 8:  PRESS THE BUTTON UNDER EXIT AND HANG UP

Once your greeting is recorded you need to set it as the override mailbox:

STEP 1: PRESS ICM, DIAL 700.

“please enter the mailbox number”

STEP 2: DIAL 300

“you have no new messages”

STEP 3: DIAL 72

“welcome to the system administrator menu”

STEP 4: PRESS 6 FOR ANSWER SCHEDULE OVERRIDE

“please enter the table number”

STEP 5: PRESS 1

“Answer schedule over ride is off…”

STEP 6: PRESS THE SOFTKEY UNDER ON, PRESS THE SOFTKEY UNDER MAILBOX AND ENTER 803 (003 on older systems)

STEP 7:  PRESS THE SPEAKER BUTTON TO HANG UP

Don’t forget to turn answer schedule override off when you return to the office.  This can be done by following the above steps and choosing OFF at step 6.

NEC DSX 22B Display Tel Recording A Night Greeting

Posted on

STEP 1: PRESS ICM, DIAL 700.

“please enter the mailbox number”

STEP 2: DIAL 300

“you have no new messages”

STEP 3: DIAL 72

“welcome to the system administrator menu”

STEP 4: PRESS THE BUTTON UNDER INST (OR NEXT TO INSTRUCTION ON A 34-BUTTON SUPER DISPLAY PHONE)

“please enter the mailbox number for the instruction menu”

STEP 5: DIAL 801

“press r to record an instruction menu”

STEP 6: PRESS THE BUTTON UNDER REC

“start recording when you hear the tone, press the # key when you are done”

Thank you for calling. Our normal operating hours are Monday through Thursday 9:00 am to 4:30 pm and Friday 9:00 am to 3:00pm. To leave a message press 1, and you will be contacted as soon as possible. Thank you for calling.

STEP 7: PRESS THE BUTTON UNDER DONE OR #

STEP 8:  PRESS THE BUTTON UNDER EXIT AND HANG UP

NEC DSX Intramail PRO Voice Mail

Posted on

NEC DSX Intramail PRO Voice Mail

One of the reasons why the NEC DSX-40, NEC DSX-80 and NEC DSX-160 telephone systems have become so popular in today’s business marketplace might be because of their NEC DSX Intramail PRO Voice Mail. NEC DSX Intramail voicemail has emerged as a viable option because it features programming simplicity, powerful memory storage and an affordable price.

There are a number of functions which highlight the voicemail services available on the NEC DSX systems. The first is a digitized emulation of an answering machine. Once a voicemail is delivered, it is automatically routed to the corresponding mailbox or mailboxes. (Callers have the option of leaving voice mails on multiple mailboxes at the same time.) Callers can leave their caller ID, and that is true for people inside and out of the business intranet.

If you decide upon the 34-button display telephones, it will greatly facilitate the management of your employees’ voice mails. They will have one-touch forwarding as well as one-touch voice mailbox access and retrieval. The whole NEC DSX Intramail PRO Voice Mail package is streamlined so your employees can check faster, more often, and with less hassle.

On the services side, we are here to make sure that your employees get more out of their NEC DSX Intramail PRO Voice Mail. At the time of purchase, come to us with a set of business requirements, including number of employees, number of headsets, and voice mailbox numbers. We’ll do the programming for you so your employees don’t have to. Once they first log into the system, they’ll be able to modify their own mailboxes to individual specifications.

NEC DSX Telephone System

Posted on

The NEC DSX Telephone System was designed for mid-sized businesses whose size might increase in the next few years. Principally, the NEC DSX Telephone System was created on the success of its predecessor, the NEC DS2000. Whereas the DS2000 can accommodate a maximum of thirty-two Lines, the NEC DSX Telephone System increases that amount to sixty-four lines. What’s more, the NEC DSX Telephone System has the capacity to upgrade to 104 ports, with an available new 8 slot cabinet.

This system is great because it allows your business to accommodate more employees without radically changing the core programming of your system. Speaking from a hardware perspective, the NEC DSX Telephone System has the power to adequately handle increased headsets and call volume. And you don’t have to reprogram the entire system to do it.

All the features you’ve come to expect from an NEC Telephone System are present in the NEC DSX Telephone System, like caller ID, speed dial, voice over, group call pickup, and multi-party conference. Perhaps the NEC DSX Telephone System’s most useful new feature is its Intramail voice mail system. Now you can actually record a conversation for posterity purposes, as well as “park and page” your calls so that they are routed effectively.

When you have decided on the features and functions you want installed on your NEC DSX Telephone System, we’ll program the headsets so that they are already set up and operational when your employees plug their phones in. In business, productivity is everything. The last thing you want is your employees wasting time trying to figure out how to work their new phones. Let us do the worrying for you!

NEC DSX 22B Display Tel common feature buttons

Posted on

Line appearance keys

The first row of button usually has your line keys labeled line 1 – line x

A line key provides an extension user with one-button access to outside lines. The extension user just presses a line key to place or answer a call on the line. There is no need to dial codes to access or intercept outside calls. In addition, a line key provides a Busy Lamp Field (BLF) for the line to which it is assigned (see the table below).

Off – Idle or not installed
On (red) – In use or on Exclusive Hold at a co-worker’s extension
On (green) – In use at your extension
Wink On (red) – On System Hold at a co-worker’s extension
Wink On (green) – On System Hold at your extension
Double Wink On (green) – On Exclusive Hold or recalling your extension
Slow Flash (red) – Ringing into the system
Slow Flash (green) – Ringing or recalling directly to your extension

To place a call using a line key:

1. Lift the handset.
2. Press the line key.
3. Dial the outside number.

To answer an incoming call using a line key.

1. Listen for ringing and look for the flashing line key.

  • Line keys that flash red are for you and your co-workers.
  • Line keys that flash green are just for you (such as DILs and transfers).

2. Lift the handset.

3. Press the flashing line key.

  • If you have Ringing Line Preference, lifting the handset answers the call.
  • If you have Automatic Handsfree, while on a call you can press another line key to put your first call on Hold.

Auto-Attendant Answer

If your incomming calls ring to either an operator phone (usually extension 300) or a group of phones pressing this button will make the auto-attendant answer instead.  Callers will hear your company greeting (Hi thank you for calling xyz company….) instantly.  If your auto-attendant answers calls all of the time you will not have this button on your phone.

Operator Message

This button will flash when a message has been left in your general delivery mailbox.  To check the message simply press the flashing operator message button.  Although extension 300 is usually the operator extension the general delivery messages are NOT stored in mailbox 300.  This is to give you the option of having a generic mailbox and a personal mailbox for the employee at extension 300.  Pressing the operator message button will also allow you to record the greeting that is heard when an outside caller reaches the general delivery mailbox.

Operator Call

The operator call button give you a visual or audio indication that someone has pressed 0 (for the operator) from the auto-attendant.  To answer the call you simply press the operator call button or the line button (this can also be programmed to answer when the handset is lifted).

Hotline buttons

Hotline gives a keyset user with a programmed Hotline key one-button calling and Transfer to another extension (the Hotline partner). Hotline helps co-workers that work closely together. The Hotline partners can call or Transfer calls to each other just by pressing a single key.

Hotline Busy Lamp Indications

Off – Idle or not installed
On – Busy or ringing1
Medium Flash – Partner extension is in DND for outside
calls (option 1).
Fast Flash – Partner extension is in DND for Intercom
calls (option 2) or All Calls (option 3).

Speed Dial Keys

The 10 keys  below the display are your speed dial keys.  These can be used to store frequently dialed telephone numbers.  For a tutorial on programming the speed dial numbers click here.