Recording the built in auto-attendant greeting on an NEC DSX

Posted on

The following is instructions on recording an auto-attendant greeting using the built-in auto-attendant (not the Intramail).  Follow this link for instructions on recording an auto-attendant greeting when you are using the Intramail voice mail. Note that when using the built-in auto-attendant there is no messaging capabilities.  In order to take messages you will need to add an Intramail Voice Mail Card.

STEP 1: Verify you are at extension 300 (or the administration extension).

STEP 2: With the handset down press #24

“Enter the mailbox number”

STEP 3: DIAL 801 (on older systems you might have to dial 000)

STEP 4: PRESS THE BUTTON UNDER REC

“start recording when you hear the tone, press the # key when you are done”

Thank you for calling. Our normal operating hours are Monday through Thursday 9:00 am to 4:30 pm and Friday 9:00 am to 3:00pm. If you know your parties extension you may dial it at any time or remain on the line for an operator. Thank you for calling.

STEP 5: PRESS THE BUTTON UNDER DONE OR #

STEP 6:  PRESS THE BUTTON UNDER EXIT AND HANG UP

Samsung OfficeServ 7100 Software Version 4.22 Availability

Posted on

Samsung Telecommunications America is pleased to announce the release of V4.22 system software for the OfficeServ 7100 phone system. Effective October 13, 2008 all software media cards for the OfficeServ 7100 phone system will ship with V4.22 software date code 08.08.20.

SIP Service Support is here…SIP Trunking and SIP stations

The new V4.22 software for the OfficeServ 7100 phone system features the very latest technology and feature capabilities offered using the SIP protocol. In addition there are many new features and enhancements.

NEW FEATURES

SMT-W5100E Remote Location Operation – When running an OfficeServ 7100 phone system with version 4.22 software and also using the latest SMT-W5100E handset software version V01.06.04, the SMT-W5100E can be registered to the phone system from a remote location using a different subnet mask. Remote warehouses, offices or home workers are prime candidates that will benefit from using remote wireless handsets.

Call Pickup Group Enhancement – Call pickup groups in the OfficeServ 7100 phone system have been enhanced with two optional features:

  • The Receive Group Info feature enables members of a pickup group to see information for calls ringing to another member of the pickup group
  • The Ping Ring feature allows calls made to a member of a pickup group to briefly alert other members with a short burst of ring tone

Missed Calls Display – A new feature for the OfficeServ 7100 telephone system has been added called “MISSED CALL”. When set to “ON” the Samsung phone will display information about missed calls made to the phone. This information includes the number of missed telephone calls as well as the ID of the most recent missed telephone call.
NOTE:This feature only applies to Samsung iDCS, Samsung DS and Samsung ITP phones equipped with a 2-line display.

Dynamic Answer Group – A new feature for Samsung OfficeServ phone systems has been added that allows users to create an Answer Group for their Samsung phone. Answer Groups are dynamic, on-demand unconditional ring groups. This means all Samsung iDCS, DS and ITP phones in the group will ring simultaneously and that Samsung phones are not predefined in the Samsung OfficeServ telephone system.

Do Not Display Outbound Trunk Information – A new feature has been added that when set to “on” disables the trunk display on outgoing calls. This feature addition was made to make the display easier to read when Caller ID and the call Timer are both displayed on the Samsung iDCS, DS, or ITP phone.

OfficeServ 7000 installation tool (for Samsung telephone systems)

Posted on

OfficeServ 7100, 7200 and 7400 telephone system installation tool – IS-TOOL V1.22 (080820) RELEASE UPGRADE PROCEDURE

The IS-TOOL V1.22 software supports the software version V4.22 up to V4.53 OfficeServ 7000 software release. You will have to upgrade the IS-TOOL program with this new software before you attempt to upgrade your OfficeServ 7000 Switch with V4.22 Release.

Here are the steps to upgrade your IS-TOOL:

  1. Download the attached zipped file to the Dealer’s PC.
  2. Double CLICK on your ZIPPED version of V1.22 IS-TOOL on your PC. You will see several files that were zipped.
  3. Double CLICK on the SETUP.EXE file.
  4. Select the REPAIR option to upgrade your IS-TOOL file. This is the default.
  5. The Upgrade Program will complete the upgrade. Please check the IS-TOOL information tab and verify version V1.22 date code (080820).
  6. You can now continue with the OS7000 Software Upgrade V4.22.

Download the installation tool

Related downloads:

Samsung OfficeServ 7100 telephone system version 4.22

OfficeServ 7100 telephone system version 4.22

Posted on

Samsung Telecommunications America is pleased to announce the release of V4.22 system software for the Officeserv 7000 telephone systems. Effective October 13, 2008 all software media cards for the OfficeServ 7000 telephone systems will ship with V4.22 software date code 08.08.20.

For details on added features please visit this link

To download the new OfficeServ installation tool please visit this link

Download Samsung OfficeServ 7100 telephone system version 4.22

Changing the time and date NEC DSX 22B display tel

Posted on

To change the time and date on a NEC DSX telephone system using a NEC 22B Display Tel or a NEC 34B Display Tel follow these steps:

  1. Locate extension 300 (You can get the extension number by pressing 6 with the phone in an idle state
  2. With the phone in an idle state press # 8 3
  3. Enter 2 digits for the hour (24 hour format)
  4. Enter 2 digits for the minutes
  5. Enter 2 digits for the seconds
  6. Press the HOLD button
  7. Enter 2 digits for the month
  8. Enter 2 digits for the day
  9. Enter 4 digits for the year
  10. Press the HOLD button and then the SPEAKER button to exit programming

If you make a mistake while entering the time and date you can press the CLEAR button to start over.

Changing the time and date NEC DS1000 and DS2000

Posted on

To change the time and date on a NEC DS1000 or DS2000 telephone system using a NEC 22-BTN Display Tel or a NEC 34-BTN Display Tel follow these steps:

  1. Locate extension 300 (You can get the extension number by pressing 6 with the phone in an idle state).
  2. With the phone in an idle state press # 8 3
  3. Enter 2 digits for the hour (24 hour format)
  4. Enter 2 digits for the minutes
  5. Enter 2 digits for the seconds
  6. Press the HOLD button
  7. Enter 2 digits for the month
  8. Enter 2 digits for the day
  9. Enter 4 digits for the year
  10. Press the HOLD button and then the SPEAKER button to exit programming

If you make a mistake while entering the time and date you can press the CLEAR button to start over.

Changing the time and date – Samsung phone system

Posted on

To change the time and date on a Samsung iDCS100, OfficeServ 7100, OfficeServ 100, OfficeServ 7200, OfficeServ 7400, iDCS500, 50si, DS616 and iDCS16 you must first log into admin programming:

  1. Leave the handset down and press Transfer 200
  2. Enter the pass code (1 2 3 4 by default)
  3. Press 1 and then Speaker

Once you are in programming mode follow these steps to change your time and date:

  1. Dial 505
  2. Enter the day of the week (Monday is 1, Tuesday is 2, Wednesday is 3, etc.)
  3. Enter 2 digits for the Month
  4. Enter 2 digits for the Day of the Month
  5. Enter 2 digits for the Year
  6. Enter the hour in 24-hour format
  7. Enter the minutes
  8. Press Transfer to exit

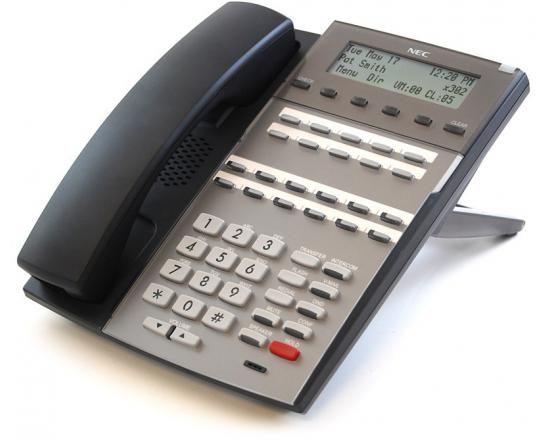
Setting A Temporary Greeting On A NEC DSX 22B Display Tel

Posted on

The first step is to record your temporary message in an instruction mailbox.  In this case we are using instruction mailbox 803 (003).  Before you record a new message in mailbox 803 make sure that it is not being used by choosing the “listen option” before re-recording.  This is assuming you have a TelephoneSystemsDirect.com NEC DSX phone system consult with your telecommunication manager before making any changes.  For further assistance call 866-898-2303 option 3.

STEP 1: PRESS ICM, DIAL 700.

“please enter the mailbox number”

STEP 2: DIAL 300

“you have no new messages”

STEP 3: DIAL 72

“welcome to the system administrator menu”

STEP 4: PRESS THE BUTTON UNDER INST (OR NEXT TO INSTRUCTION ON A 34-BUTTON SUPER DISPLAY PHONE)

“please enter the mailbox number for the instruction menu”

STEP 5: DIAL 803 (may be 003 on older systems)

“press r to record an instruction menu”

STEP 6: PRESS THE BUTTON UNDER REC

“start recording when you hear the tone, press the # key when you are done”

Thank you for calling. Our normal operating hours are Monday through Thursday 9:00 am to 4:30 pm and Friday 9:00 am to 3:00pm. To leave a message press 1, and you will be contacted as soon as possible. Thank you for calling.

STEP 7: PRESS THE BUTTON UNDER DONE OR #

STEP 8:  PRESS THE BUTTON UNDER EXIT AND HANG UP

Once your greeting is recorded you need to set it as the override mailbox:

STEP 1: PRESS ICM, DIAL 700.

“please enter the mailbox number”

STEP 2: DIAL 300

“you have no new messages”

STEP 3: DIAL 72

“welcome to the system administrator menu”

STEP 4: PRESS 6 FOR ANSWER SCHEDULE OVERRIDE

“please enter the table number”

STEP 5: PRESS 1

“Answer schedule over ride is off…”

STEP 6: PRESS THE SOFTKEY UNDER ON, PRESS THE SOFTKEY UNDER MAILBOX AND ENTER 803 (003 on older systems)

STEP 7:  PRESS THE SPEAKER BUTTON TO HANG UP

Don’t forget to turn answer schedule override off when you return to the office.  This can be done by following the above steps and choosing OFF at step 6.
NEC DSX 22B Display Tel Recording A Night Greeting

Posted on

STEP 1: PRESS ICM, DIAL 700.

“please enter the mailbox number”

STEP 2: DIAL 300

“you have no new messages”

STEP 3: DIAL 72

“welcome to the system administrator menu”

STEP 4: PRESS THE BUTTON UNDER INST (OR NEXT TO INSTRUCTION ON A 34-BUTTON SUPER DISPLAY PHONE)

“please enter the mailbox number for the instruction menu”

STEP 5: DIAL 801

“press r to record an instruction menu”

STEP 6: PRESS THE BUTTON UNDER REC

“start recording when you hear the tone, press the # key when you are done”

Thank you for calling. Our normal operating hours are Monday through Thursday 9:00 am to 4:30 pm and Friday 9:00 am to 3:00pm. To leave a message press 1, and you will be contacted as soon as possible. Thank you for calling.

STEP 7: PRESS THE BUTTON UNDER DONE OR #

STEP 8:  PRESS THE BUTTON UNDER EXIT AND HANG UP

NEC DSX Intramail PRO Voice Mail

Posted on

NEC DSX Intramail PRO Voice Mail

One of the reasons why the NEC DSX-40, NEC DSX-80 and NEC DSX-160 telephone systems have become so popular in today’s business marketplace might be because of their NEC DSX Intramail PRO Voice Mail. NEC DSX Intramail voicemail has emerged as a viable option because it features programming simplicity, powerful memory storage and an affordable price.

There are a number of functions which highlight the voicemail services available on the NEC DSX systems. The first is a digitized emulation of an answering machine. Once a voicemail is delivered, it is automatically routed to the corresponding mailbox or mailboxes. (Callers have the option of leaving voice mails on multiple mailboxes at the same time.) Callers can leave their caller ID, and that is true for people inside and out of the business intranet.

If you decide upon the 34-button display telephones, it will greatly facilitate the management of your employees’ voice mails. They will have one-touch forwarding as well as one-touch voice mailbox access and retrieval. The whole NEC DSX Intramail PRO Voice Mail package is streamlined so your employees can check faster, more often, and with less hassle.

On the services side, we are here to make sure that your employees get more out of their NEC DSX Intramail PRO Voice Mail. At the time of purchase, come to us with a set of business requirements, including number of employees, number of headsets, and voice mailbox numbers. We’ll do the programming for you so your employees don’t have to. Once they first log into the system, they’ll be able to modify their own mailboxes to individual specifications.