Voice Over and Reverse Voice Over On The NEC DSX-80 Telephone System

Posted on

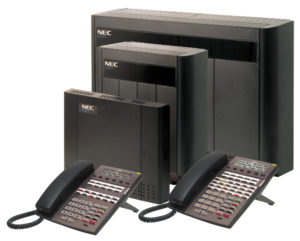
How many times have you missed that important call from a paying customer because you were on the phone setting up your Tee Time for this Saturdays’ golf game? The NEC DSX-80 telephone system’s Voice Over feature could help a lawyer, for example, waiting for an urgent call. While on a call setting up a Tee Time, the lawyer’s paralegal could announce the urgent call as soon as it comes in. The lawyer could then give the paralegal instructions on how to handle the situation – all without the Pro Shop hearing the conversation.

The NEC DSX-80 telephone system uses Voice Over to let a user get through to a keyset extension user busy on a handset call. With Voice Over, the busy keyset extension user hears an alert tone followed by the voice of the interrupting party. The NEC DSX-80 telephone system keyset extension user can respond to the interrupting party without being heard by the original caller. If desired, the keyset extension user can easily switch between their original caller and the interrupting co-worker. The original caller and the interrupting party can never hear each other’s conversation.

The salesperson just presses and holds down a programmed Reverse Voice Over key to make a private call to the assigned assistant. The initial caller cannot hear the Reverse Voice Over conversation. The private intercom call continues until the Reverse Voice Over caller releases the key again.

The initial handset call on the NEC DSX-80 telephone system can be an outside call or an Intercom call. An NEC DSX-80 extension can have Reverse Voice Over keys for more than one co-worker. When the keyset is idle, the Reverse Voice Over key functions the same as a Hotline key. The key also shows at a glance the status of the associated extension on the NEC DSX-80 telephone system.

Off Premises Call Forwarding with the NEC DSX Telephone System

Posted on

Forwarding all of your calls to an external number is best accomplished by using the phone company forwarding option but if that feature is not available the NEC DSX can be programmed to forward calls for you. There are two methods for doing an off-premise forward, tandem trunking or flash transfers.

Tandem trunking uses two phone lines, one incoming line and one outgoing line, to transfer calls to an off-premise number. These two lines will be tied up for the duration of the conversation. When using Tandem Trunking you want to make sure that you have the phone company feature disconnect supervision (sometimes called far-end disconnect or gauranteed disconnect) on your lines, otherwise your lines might stay tied up after the conversation has finished.

Flash Transfer is the preferred method for transferring calls off premise. A flash transfer transfers the caller back out on the same line they called in on, thus removing the call from your phone system and freeing that line for another incoming caller. To use this feature you will need to have the flash transfer (or 3rd party conference) feature from your telephone company.

Possible Uses:

One great way the NEC DSX phone system can save your company money is by eliminating your night answering service. Your service department dispatcher’s telephone rings direct for lines 1-4 during the day. The dispatcher answers calls on those lines and assigns technicians accordingly. At night, the calls on lines 1-4 must automatically route to the technician on call for emergency service. The NEC DSX phone system feature that makes this possible is “Off Premises Call Forwarding”. This feature allows your service department dispatcher to forward the calls to an off-site location (such as a cell phone or remote office). This can be set up using either the tandem trunking or flash transfer methods above.

Any NEC DSX phone system keyset users can also stay in touch by having Off Premises Call Forwarding automatically forward their calls while they are away from the office. To set up Off Premises Call Forwarding, the user selects the line or Line Group over which the call should route, as well as the number the NEC DSX phone system should dial. The number dialed can be from an extension’s personal speed dial bin containing an outside number, or the user can enter an outside number directly into their personal speed dial bin 720. When a call rings the forwarded extension, the NEC DSX phone system selects the specified line or group and then out dials the stored number. Currently this implementation of off premise forwarding only works with the tandem trunk method.

Programming:

Note: This method will only work if a caller is transferred directly to OR directly dials your extension number, this will not work on KEY RINGING Calls or group calls.

  1. With the handset down press Intercom * 3
  2. Press the sofkey under More.
  3. Press the softkey under OffP. If you don’t have OffP as an option then your extension’s class of service does not allow off-premise forwarding.
  4. Press the softkey under Num.
  5. Enter 90 for the Line/Group/Intercom and press HOLD: This is where you tell the phone system what line to dial out on. 90 is like dialing 9, it will grab the last available line on the phone system. If you wanted to dial out only on line 3 you could enter 103 here.
  6. Enter the telephone number you want your calls forwarded to and press HOLD. The number should be entered the same as if you were dialing it from one of the NEC DSX phones.
  7. Press the softkey under All to forward intercom calls and outside calls OR the button under Line to just forward outside calls.
  8. Your telephone display should now read FWD OFP>> XXXXXXXXXX

To Cancel Off Premise Forwarding press Intercom * 3 and choose the new forwarding type.

Changing The Name On A NEC DSX 22B Display Tel

Posted on

NEC DSX Version 3 Instructions

To program your extension’s name:

  1.   Push Menu + Name (Menu + 81).
  2.   Enter the name using the keypad.
  3.   Push Save when you are done or Cancel to exit without saving.

To program a name for your co-worker’s extension (From Operator/Admin Extension):

  1.   Push Menu + Admin + Extension Name (Menu + 03).
  2.   Enter your co-worker’s extension number and push Next.
  3.   Enter the name using the keypad.
  4.   Push Save when you are done or Cancel to exit without saving.

NEC DSX Software Version 2

To change the name that is displayed on your NEC DSX 22B display tel telephone:

  1. Press the soft key under Menu
  2. Press the soft key under More until you see Name on your display
  3. Press the soft key under Name
  4. Press the Clear button to erase the current name and use the keypad to enter the new name
  5. Press the Speaker button to exit

If you are using the auto-attendant dial by name directory the name you program here will determine your listing in the directory. If you do not have Name as one of your soft key options then your station does not have the class of service to change names and it must be programmed from extension 300.

NEC DSX Telephone System 3.43 Software Release

Posted on

DSX System Software version 3.43 is an important new release that introduces many new IntraMail features, implements VoIP QoS capability, offers Dial while in a Conference, and provides other new features and software corrections. The companion System Administrator version 3.33 is required for this new release and is also available. The new System Administrator also includes new Voice Prompts (v2.40) that are necessary for several of the new IntraMail features.

IntraMail

First Time Setup

When logging into their mailbox for the first time, the mailbox subscriber is prompted to set up their Security Code, record a personalized Mailbox Name, and record their Greeting. First Time Setup helps personalize and secure each mailbox. The subscriber can follow the voice prompt instructions and complete these steps or optionally skip the options and go right to their mailbox. If they skip the First Time Setup options, they will not repeat unless the mailbox is initialized.

Initialize Mailbox

Initialize Mailbox allows the installer to return any mailbox to its initial default state. This is typically done when an employee leaves the company and a new employee wants to use the same mailbox. Initializing a mailbox:

  • Erases the Security Code
  • Deletes all Greetings
  • Deletes the Mailbox Name
  • Deletes the Paging Message
  • Erases all messages in the mailbox
  • Turns First Time Setup back on
  • Sets all other options for the mailbox to their default settings.

Greeting Schedules

The three mailbox Greetings can be put in a schedule so that they are active on different days at different times. This allows the subscriber to customize their greetings for different periods during the work week. For example, Greeting 1 can be active every day of the week when not in the office, Greeting 2 can be active during work hours (Mondaythrough Friday from 8AM to 5PM), and Greeting 3 can be active every work day during lunch (Monday through Friday from 12PM to 1PM).

In lieu of scheduling, a greeting can be made Active at All Times. This operates identically to non-scheduled greetings in prior releases. By default, greetings are not scheduled and Greeting 1 is Active At All Times.

When a subscriber logs into their mailbox and presses Greet(Greeting), the voice prompts tell them which Greeting is active and if a Greeting is set for Active at All Times.

Busy Greeting

The Busy Greeting is a unique mailbox Greeting that can play to Automated Attendant callers when the extension is busy. For example, the Busy Greeting could say, “I’m on the phone right now. Leave me a message and I’ll call you right back.” This lets the caller know that the extension user is busy on the phone, not away from their desk or out of the office.

While the extension user is busy on a call, the Busy Greeting will play to Automated Attendant callers who were routed to the busy extension via Screened Transfer. All other callers will be handled normally by the system and hear the active Greeting.

Find Me Follow Me Day of Week Selection

The Find Me Follow Me schedule is enhanced with the day of week selection. In addition to the destination start and stop times, the Find Me Follow Me schedule now allows destinations to be enabled and disabled for each day of the week.

Message Notification Day of Week Selection

The Message Notification schedule is enhanced with the day of week selection. In addition to the destination start and stop times, the Message Notification schedule now allows destinations to be enabled and disabled for each day of the week.

Directory Dialing Automatic Routing

If an outside caller is answered by a Directory Dialing Mailbox, and they dial the first few letters of a person’s name, they will be automatically routed to a list of choices without having to dial #. This is helpful to callers who are unaware that they should dial # to complete their entry. Dialing # is still available, and saves time, but it is no longer required to complete the routing. In prior software versions, if the caller forgot to dial # they would be prompted to repeat their entry and routing would not occur.

Dial Action Table Go Back Option

The Dial Action Table Go Back option returns an Automated Attendant caller to the Routing Mailbox from which they came. For example, an Automated Attendant could be set up with successive Goto options that allow the caller to access Call Routing Mailboxes for national, regional, state and local Sales offices. The Go Back option would allow:

  • A caller in the local Call Routing Mailbox to back up to the state office.
  • A caller in the state Call Routing Mailbox to back up to the regional office.
  • A caller in the regional Call Routing Mailbox to back up to the national office.

Dial Action Table Alternate Transfer Destinations

Each Dial Action Table digit can have two simultaneous assignments: aDialed Transfer Assignment and an Alternate Assignment. The Dialed Transfer Assignment is a Screened or Unscreened Transfer to an extension or Department Group corresponding to the dialed digit. By default, digits 3 and 4 have UTRF Dialed Transfer Assignments. This means that an Automated Attendant caller can dial any extensions within the 3xx and 4xx range.

The Alternate Assignment overlays the Dialed Transfer Assignment. If the caller dials a single digit, after about a second they route to the Alternate Assignment. If they dial digits in succession, they route to the Dialed Transfer Assignment.

Alternate Transfer Destinations allows you to set up robust call handling scenarios with a minimum of Dial Action Tables and Call Routing Mailboxes.

Post Dial Announcement

The Post Dial Announcement is an announcement that plays to an Automated Attendant caller after they have dialed their destination butbefore the call is routed. A typical application for the Post Dial Announcement is to play an additional message prior to routing the caller to a customer support group. The message that plays is the Announcement Mailbox Message for an Announcement Mailbox specified as the Post Dial Announcement Mailbox for the answering Call Routing Mailbox. Each Call Routing Mailbox can have its own Post Dial Announcement Mailbox or it can be shared. When setting up the Dial Action Table for the Call Routing Mailbox, program the Alternate Assignment as you would normally but include A anywhere in the Routing dial string to have the Post Dial Announcement play.

Universal Compatibility for IntraMail Email Notification

DSX System Software Version 3.42.16 enhances IntraMail Email Notification by providing compatibility with HTML email, text-based email, and SMS (Short Message Service) messaging. The operation is automatic and is determined by the email client on the destination device (smart phone, cell phone, or PC) and the address entered in Stations: 

Door Box

Door Box Enhancements

Distinctive Chiming

To make it easier for users to determine which Door Box is ringing, each of the standard Door Box chimes can be set to ring one, two, or three times.

Programmable Door Alert Time

The length of time a Door Box will remain active after a visitor at the door presses the Call button is now programmable (1-9999 seconds). An extension receiving the Door Box chime or ring can lift the handset anytime during the Door Alert Time to connect to the Door Box. In prior software versions, the Door Alert Time was fixed at 30 seconds.

FXS/SIP 3rd-Party Door Box Support

An FXS or SIP 3rd-party Door Box can be set up in system programming to operate like a standard proprietary Door Box. For example, by assigning a device as a Door Box, you can program the chime type, relay options, and Ring Group options. When a visitor at the 3rd-party Door Box presses the Call button, it will chime or ring just like a proprietary device. When an extension user answers, DTMF relay controls (if supported in the 3rd-party Door Box) will also be available. Additionally, the 3rd-party device will also follow the Programmable Door Alert Time and Distinctive Chiming settings. The type of DTMF signaling sent to the SIP Door Box is determined by the Profile used by the device.
Alphanumeric Display

Digits Displayed when Calling 3rd-Party Extension
While a keyset user is on a call with an analog or 3rd-party SIP or analog extension, any digits they dial will be shown on their display. In prior software versions, the digits would not be displayed.

Names for Extensions and Lines

Name Display Simplified

For simplicity and clarity, an extension with a name assigned will display just the extension number at the end of display line 2. In prior releases, the extension was preceded by “x”.

Samsung DCS Compact Phone System Manuals

Posted on

These are the installation and programming manuals for the Samsung DCSc (DCS Compact) phone system.

Any changes should be made by or with the assistance of a certified Samsung technician.  Remote support can be purchased from TelephoneSystemsDirect.com.

DCSc Installation Manual

DCSc Program Manual

Samsung DCSc User Guides

It’s Time For A New Phone System.

It’s time to replace your Samsung Telephone System! Did you know that the average lifespan of a premises-based phone system is 5 years? If you purchase hardware today, it is going to become obsolete – it’s a question of when, not if. What will you do when you find out that the features your business relies on are no longer being upgraded or supported?

With our Business Phone Service you’ll do far more than replace one phone system with another. You will gain a flexible, feature-rich Unified Communication System that will unleash productivity within your organization at an affordable price.

We’re ready to help with answers to your questions, a demo or a fast, no-obligation quote. Use the contact form below or call us at 866.898.2303 Option 1.

NEC DS 2000 phone system intramail goes immediately to voice mail

Posted on

Problem:  On a DS1000/2000 phone system callers are sent directly to a users mailbox instead of ringing the NEC phone and then going to a mailbox.  Dialing or inter-coming  the phone extension number causes the phone to ring as normal.

Solution: This is typically caused when the NEC DS2000 or NEC DSX user inadvertently puts their mailbox in auto-attendant do not disturb.  To remove auto-attendant do not disturb press the voice mail/message key.

Enter phone system voice mail password if necessary.

Press “0” for the NEC Intramail full menu.

Press “G” or “4” for Intramail Mailbox Greetings.

Press “o” or “6” to turn auto-attendant do not disturb on or off (toggle)

Checking a phone at the phone system using a standard phone jack

Posted on

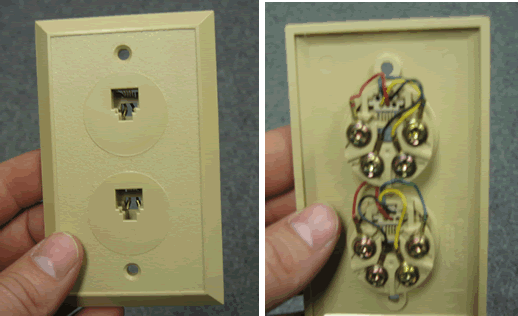
Find a standard telephone jack. This is a two port jack but only the top one will be used.

Phone Jack

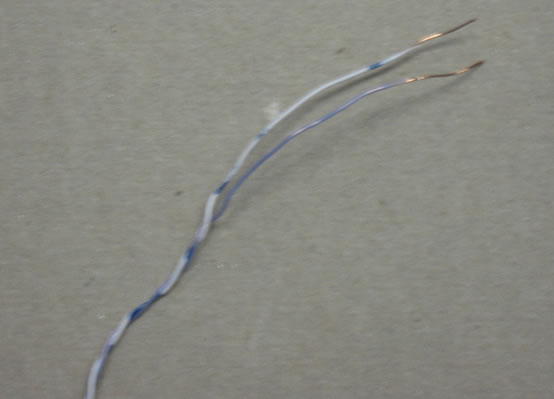
Find some wire to use. You can use the cross-connect wire supplied with your phone system or you can cut a piece of spare wire. Make sure the wire has a solid core and is not stranded, stranded wire does not make a good connection on the 66 block.

phone wire

Strip the wire so the copper is exposed.

stripped wire

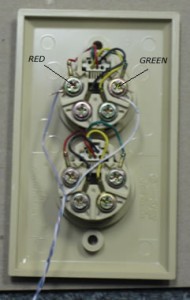
Connect the stripped wire to the Red and Green terminals on the jack.

phone jack

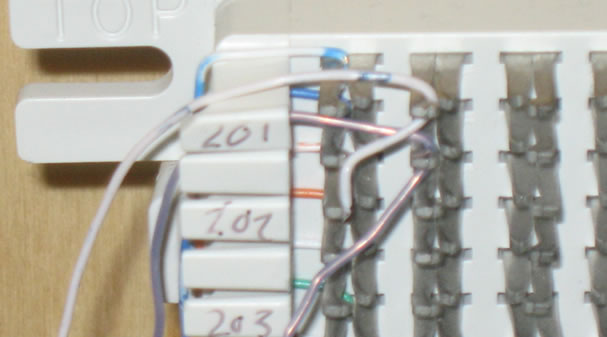
Connect the other end to the 66 block at the extension you are testing. In this example we are checking extension 201.

66 block

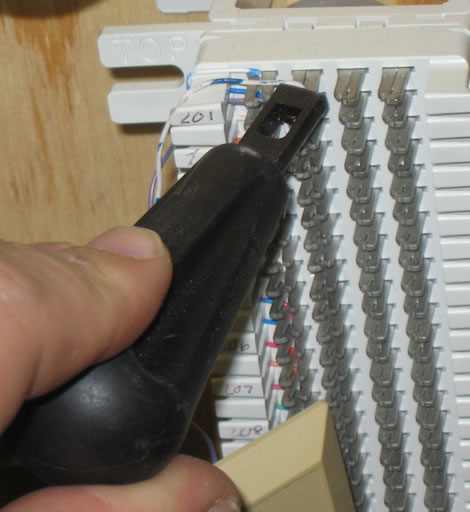
Punch down the wires using the punch down tool provided.  If you do not have a punch down tool scroll down to see how to connect the wires without a punch down tool.

punch down

If you do not have a punch down tool you can twist the wires onto the 66 block. Try not to touch the wires together.

Now plug a phone into the front of the jack.  If your phone works the phone system is OK and there may be an issue with the cable.

Changing the Day and Night Greeting on Samsung Voicemails (SVMi)

Posted on

These are instructions on changing the Day and Night greeting for a Samsung Officeserv phone system that uses a Samsung SVMi voicemail. These instructions will work on most OfficeServ 7100 phone systems, OfficeServ 7200 and7400 phone systems, OfficeServ/iDCS 100 and OfficeServ/iDCS 500 phone systems.

First log into the Admin Mailbox

  1. Press the VOICEMAIL button.
  2. You should hear “Enter Passcode”
  3. Press “*” (asterisk) and you should hear the main greeting “Thanks for calling…”.
  4. Press “#0000” to access the system administrator mailbox and you should hear “Enter the passcode”.
  5. The default passcode is 0000 (NOTE: it is possible to change this passcode so if 0000 does not work contact the company that installed your phone system).

You should hear “Welcome to the system administrator main menu, for system prompts press 1”.

Find the greeting you want to record

  1. Press “1” and you should here “Enter the prompt number”.
  2. Dial 1001 for the DAY prompt or dial 1002 for the NIGHT prompt.
  3. Press 1 to listen to the existing prompt.
  4. To re-record the prompt press 3.
  5. When done press the # key to end recording.

TEST your new recording.

NEC DS1000 and DS2000 Technical Support

Posted on Leave a comment

Our experienced technicians can troubleshoot, repair and fine tune your NEC DS1000 and DS2000  telephone system programming.   Most telephone system programming issues can be resolved by our technicians walking you through the programming steps over the telephone.  We also offer remote programming via a webmeeting.

Things you should know:

  • A detailed description of the problem.  Note any error messages that show on the phone display.
  • For remote programming we will need a computer with a serial port and the NEC DS1000 or DS2000 programming cable.  Most new laptop computers do not have serial cables so you will need a USB to serial connector.

Technical support rates are $80.00 per hour.  For more information or an estimate on how long it will take to resolve your technical problem you can contact our technical support department at 866-898-2303 opt 2.

Samsung Telephone System Technical Support

Posted on

Our experienced technicians can troubleshoot, repair and fine tune your Samsung telephone system programming. Most telephone system programming issues can be resolved by our technicians walking you through the programming steps over the telephone.  We also offer remote programming via a webmeeting.   If you are having a problem with the voice mail on your Samsung telephone system we may require that you connect a computer to the voice mail system.

Things you should know:

  • The model of your Samsung telephone system. The model can be found by looking at the phone system main cabinet (usually located in an electrical closet or phone room).  Typical models are Prostar 816, 824, 56ex, DCSC (DCS Compact), DCS, 50si, iDCS 100,  iDCS 500, iDCS 16, OfficeServ 100, OfficeServ 500, OfficeServ 7100, OfficeServ 7200, OfficeServ 7400.
  • A detailed description of the problem.  Note any error messages that show on the phone display.
  • For voice mail issues you may need a computer with a serial cable near the telephone system.  Most new laptop computers do not have DB9 ComPort so you will need a USB to serial connector.

Technical support rates are $80.00 per hour.  For more information or an estimate on how long it will take to resolve your technical problem you can contact our technical support department at 866-898-2303 opt 2.